Painting Kitchen Cabinets
![]()
When we moved, even though we spent more on a house since its more expensive here it just doesn't have the quality of our previous home. The kitchen cabinets here were just cheap. I didn't want to remodel yet, so I decided to paint. People ask me all the time how I painted the kitchen cabinets, so I thought I would just put the info on a web page so I can just send a link instead of typing it all out. I wanted the cream color cabinets with the brown glaze.
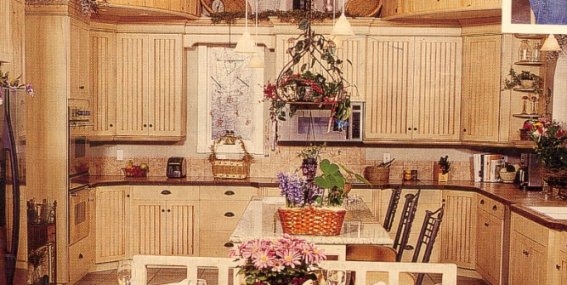
This was the look I was going for......
.
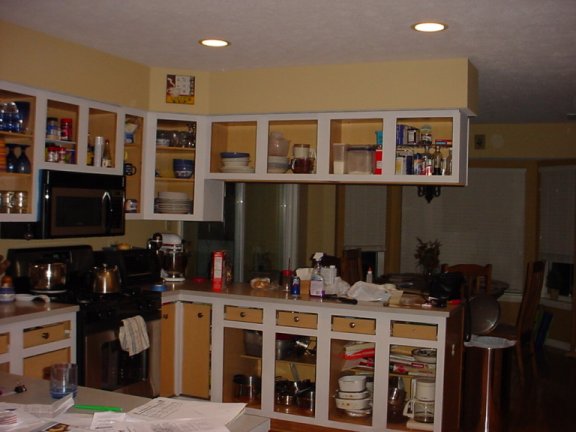
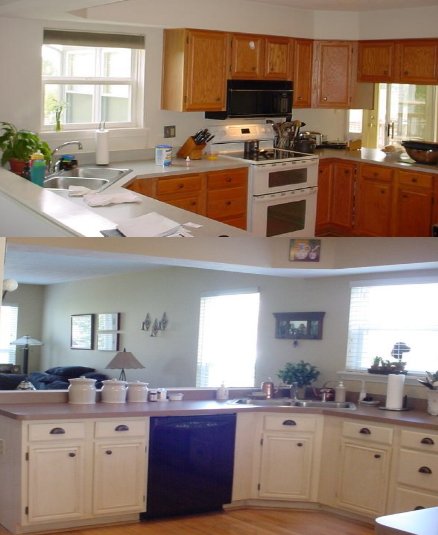
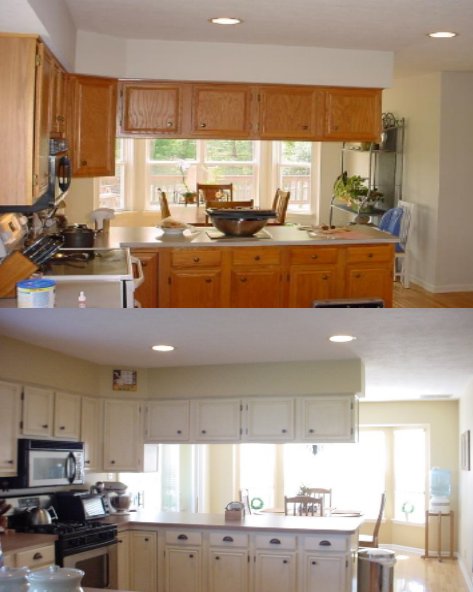
Here's the before......

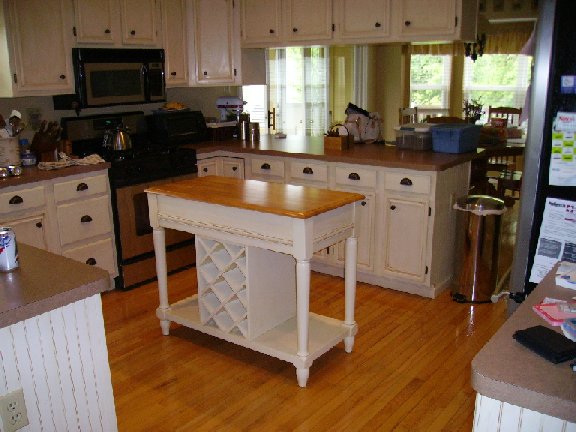
Here's the after........and there's more "after" pictures at the bottom of the page.
Should of cleared of the counters tops! :-)
Painting-
I got directions from a This Old House magazine. I found them online. It's a long process but two years later I haven't had any chips in the paint at all, so well worth taking your time and doing it right.
http://www.thisoldhouse.com/toh/article/0,,202424,00.html
I used a Sherwin Williams furniture paint that was about $40.00 a gallon, I used one gallon.
Base Color: Sherwin Williams Brown Sugar
Glazing:
Color: Behr Melted Chocolate 1 quart
Glaze: Translucent
I removed all the drawers and doors, and then removed the drawer fronts.
The cabinets were all cleaned with trisodium phosphate (TSP), this stuff is nasty! You have to wear gloves and you need to have a lot of air circulation, I think some 409 would of done the trick. After cleaning I sanded before the first coat of primer was put on. I bought lots of tack clothes to get rid of the residue, a trick I got from my house painter was to have a clean dry brush always handy to brush away the big dust particles, then I used the tack clothes. Then sanded again and primed a second coat. Sanded again, then a first coat of the paint, sanded, then a second coat of paint, then glazing. I didn't string my cabinets up to dry like the article recommend, I just did all the fronts, and then the backs and didn't have any problems. I did use good paint brushes (about $7 a piece) also, one for each coat of paint, be it primer or the color. I used different grades of sandpaper also. Detailed directions are on the This Old House link above.
Glazing...
On the can of the glaze I believe they said to dilute it three to one, but I think I did it four to one, and on the bead board I had to do five to one just because of the wood texture, it just didn't wipe off as nice. I always did the back of the cabinet doors first to practice on. Have a ton of rags handy, they get all gooky fast and nothing works better than a clean rag. I used store bought rags from Lowes that were like a men's t-shirt material or old sheets, nothing with texture to the fabric because you will get big lines in your glaze. You just paint it on and wipe it off, that's it.
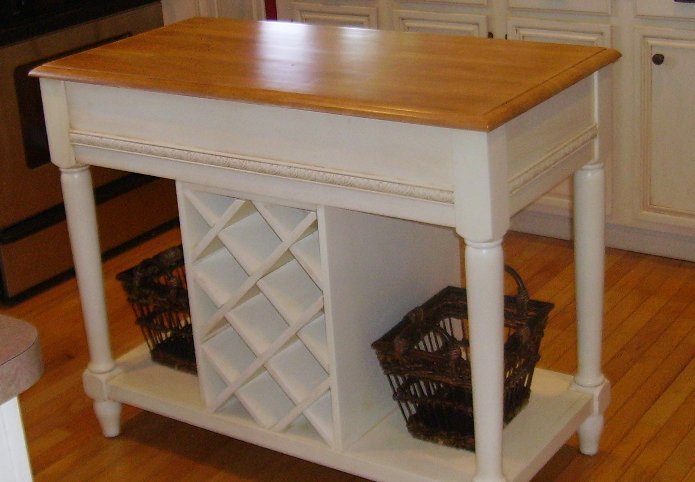
A year after I did the cabinets, I found a off white island at a furniture tent sale for 125 bucks, and I recently did the fireplace too, all in the same paint and glazing, I will put those pictures at the bottom of the page.
Little things we did to dress up the cabinets.
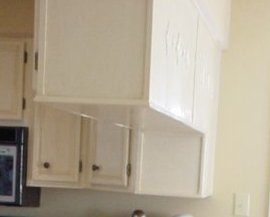
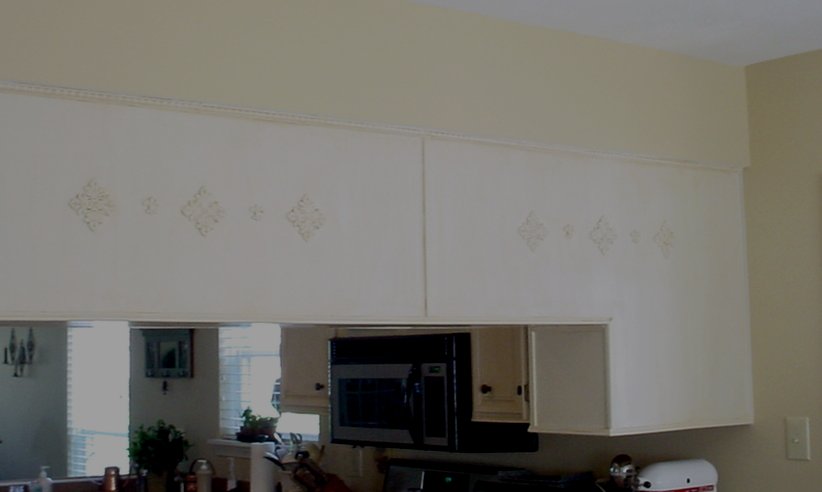
We filled in this piece of under cabinet.
Before
After
I changed the hardware on all the cabinets, the best prices for those were on Ebay. Heres the dealer I used, I've used this company twice both with great results.
http://stores.ebay.com/Cabinet-Hardware-Designs
Trim
We added a bunch of trim.........
To the bottom of the cabinets we added just some 1/2 inch stuff you can get at any Lowe's, Home Depot.......
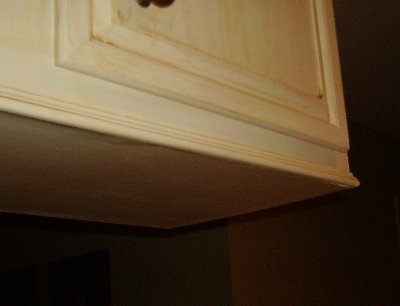
Since we didn't have a lot of space on the top, we added a small detailed trim we bought at Hobby Lobby, we couldn't find anything with the width we needed at Lowes. I wanted something with a nice design so it would show with the glaze.

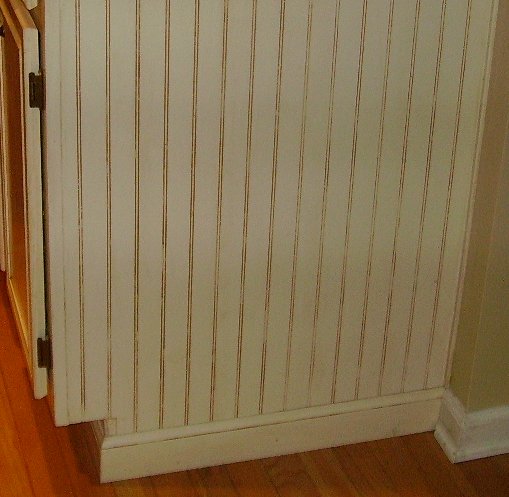
On the plain sides of the cabinets where it was just covered with a wood look paper (told ya they were cheap!) we just nailed in some bead board. We also bought some basic base board trim and nailed it over that black stuff that comes with the cabinets.
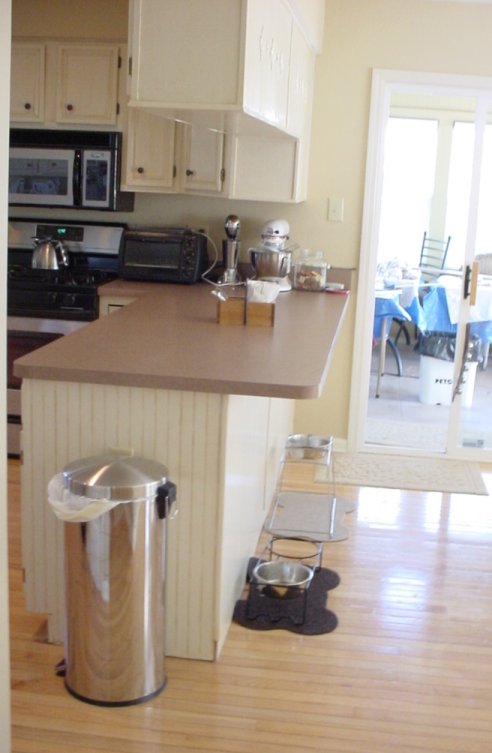
We had new formica put on, I didn't want to spend the 5000 I was quoted for hard surface since the cabinets aren't the best quality and we will end up tearing it all out and re-doing it all in the not so distant future. I did extend the counter tops on one side so we now have stools there, still have dog dishes too! This picture is missing the base board trim, and you can see where I was painting in the sunroom. :-)
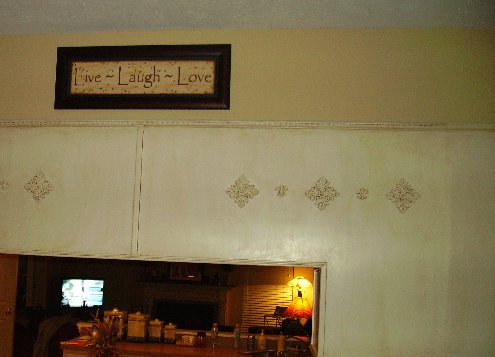
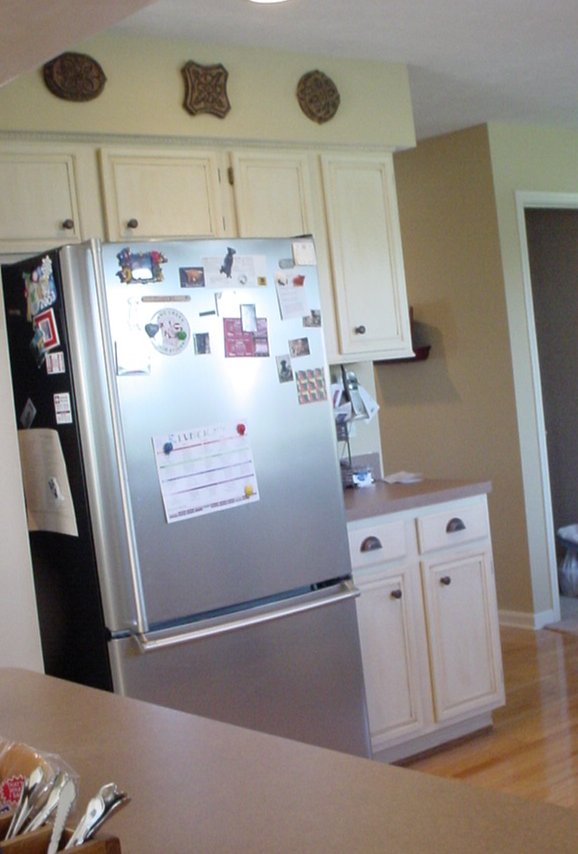
On the back of the top cabinets it also had the wood like paper, I just painted it and added some wood appliqués I got at Hobby Lobby. In hindsight I wish I had just ripped it off and put bead board there also. There's definitely a difference with the paint/glazing on this, it doesn't go on as smoothly.
More After Pictures:

More pictures of stuff I did with the same glazing
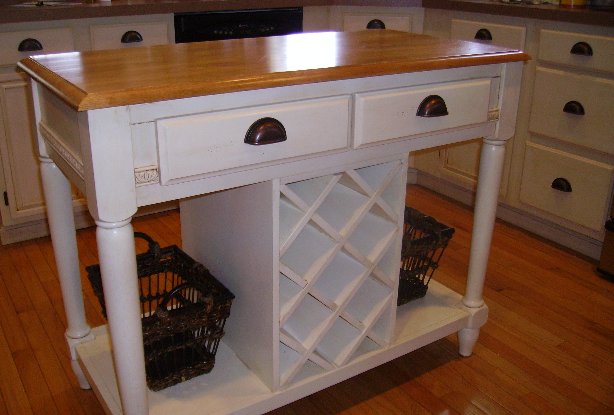
The Island before... with Riley, the neighbor's dog.
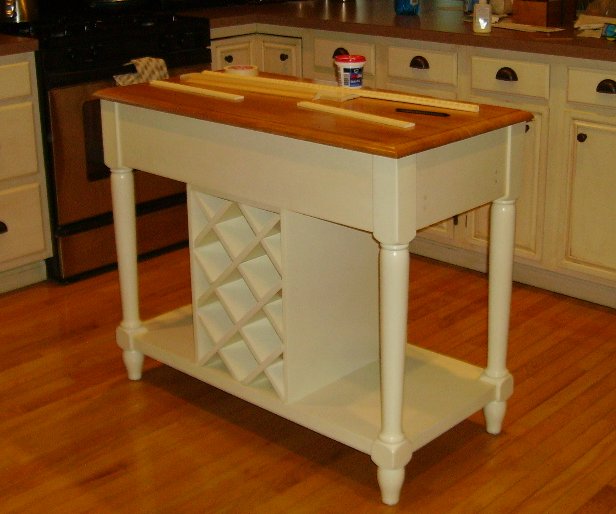
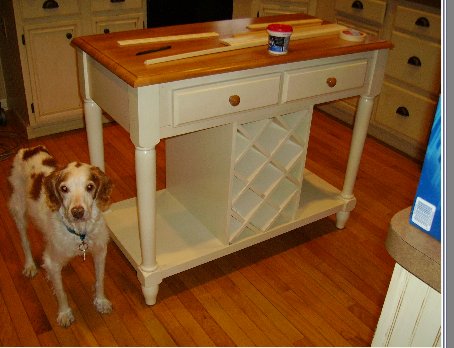
It was almost exactly the same base color as the cabinets, so all I did was add a bit of detailed trim to cover the holes of the paper towel holder I removed and all around the island, glazed it all, and changed the hardware.
After
Fireplace
I also painted and glazed the fire place, since it was just a plain white one that is in half the suburban homes across the US, and I wanted it to look different and tie into the kitchen at the same time. We replaced the tile also, since that was plain white that was painted over gray by the previous owner, and I had another custom wood stained mantle made by a friend and we just glued on top of the old one. Painted over that gold too, I used black bar-b-que paint for the heat factor.
Before
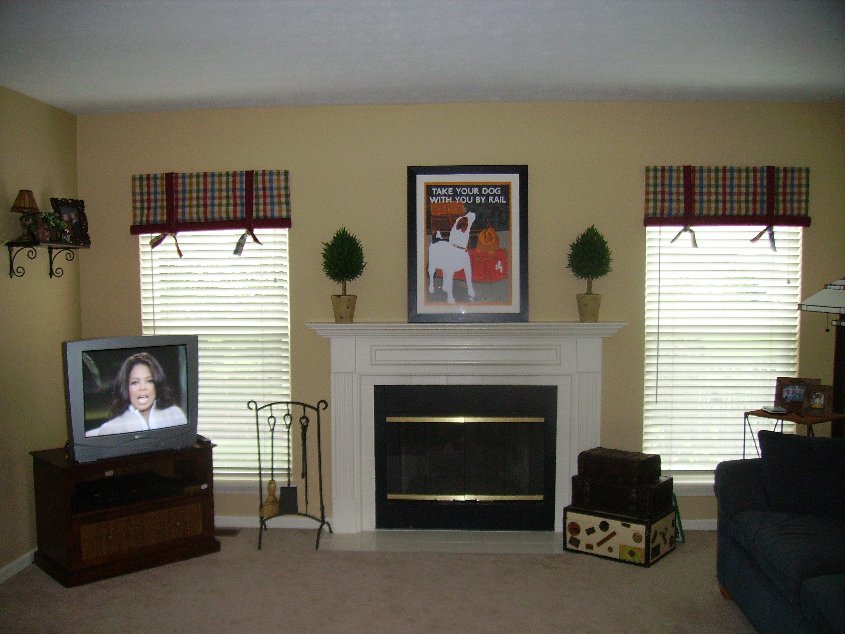
Oprah really hated it all white!
After
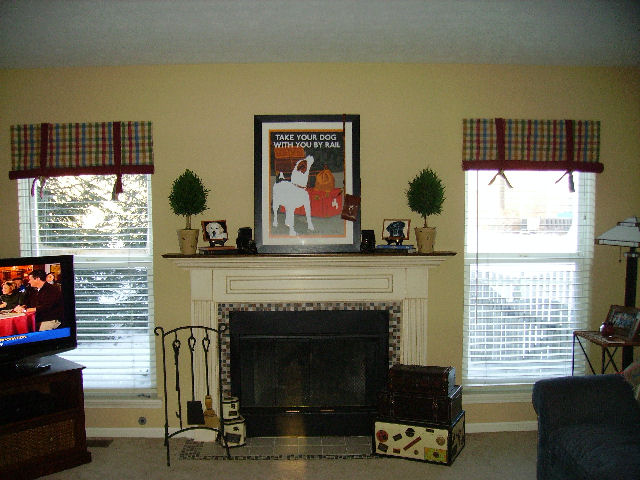
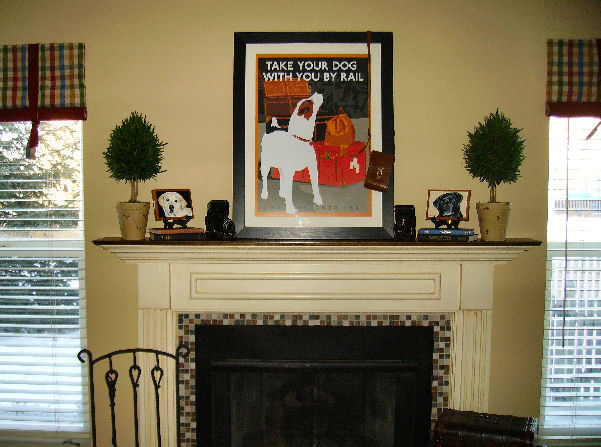
In hindsight *grin* I would of went with one color of tile, this is a bit much with the curtains.
That's all she wrote!